
The FreeBSD Diary |
 |
(TM) | Providing practical examples since 1998If you buy from Amazon USA, please support us by using this link. |
|
Dual Opteron Server - the drives
22 June 2006
|
|
In a recent article, I described a dual opteron that I was setting up. I am now in the process of setting up the storage system for this baby. It is already decked out for SATA drives, so that is what I am going to use. This article deals mainly with the drive bays, the drive caddies, and finding out which drive bays relate to what SATA connectors. This was not as easy as it sounds. Sure, if you've used these types of systems before, this article contains information that is very familiar to you. However, if you've never used a rack mountable chassis before, you'll learn as much as I did. Everything from finding the right screws to mount the drives, to figuring what drive bay is attached to what SATA cable connector. |
|
Getting the drive caddies out
|
|
Removing the caddyThe drives are accessed by pressing a button on the left side of the caddy. This action pops out a lever, which releases the little clips which hold the drive securely in the drive bay. 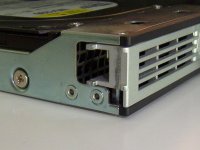
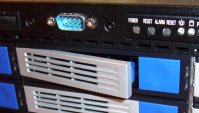
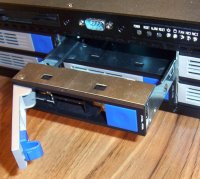
The little clip that holds in the drive caddy can be seen in the above left photograph. As the lever is closed, the little clips pull the drive caddy tightly into the drive bay. You can then pull the drive out of the drive bay, as you can see in the above center picture. It is really pretty cool the first time you do this to a running system. What is even more counter-intuitive, is putting new HDD into a powered-up system. 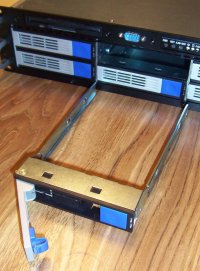
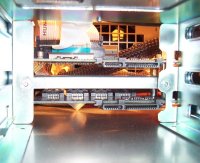
In the picture to the left, you can see a drive caddy has been completely removed from the system and is resting on the table. The are six screw holes that you can use to attach the drive to the drive caddy. Always use at least four screws. Six is better. The photo to the right shows the inside of one of the drive bays. The top and bottom caddies have been removed. You can see the power connections on the left, and the data on the right. At the back of the photo is one of the fans of the row of fans that separate the drive compartment from the main board compartment of the server chassis. |
|
Attaching HDD to the drive caddy
|
|
To the left, you can see a drive attached to the drive caddy. As you can see, there is an empty screw hole on this side. In my collection of screws left over from other systems, I found only five screws that fit this particular situation. The screws need to have a very shallow head, otherwise they will extend above the drive caddy recess that holds the screw head. This would prevent the drive caddy from sliding into the drive bay. With eight drives bays, and six screws each, I needed nearly 50 screws. I found them at my local computer recyclers, where 20 minutes of looking through three small bags of computer screws gave me what I needed. The head is very shallow, and flat. This is perfect for what I need. 50 screws sounds like a lot, but when you see them all in one place, it does not look so bad... 

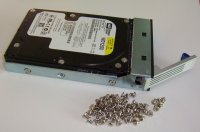
|
|
Drive lights
|
|
|
|
The SATA connectors
|
|
From left to right, this photo shows the SATA power connector, the SATA data connector, the drive jumpers, and the traditional Molex power connector typical of IDE drives. The dual power connector approach on SATA drives is a transition feature. Most newer drives, including the 400GB drive delivered with the server, are dropping the traditional 4-pin Molex connector.
|
|
The RAID controller
|
|
3Ware (now part of AMCC) has donated a SATA II Hardware RAID Controller to this project. Today I received a 9550SX-8LP. This is a half length /low profile SATA II RAID Controller with 8 ports. 3Ware sent me the full kit, and their photograph (4.1MB) is here. The 3Ware photograph (532KB) of the card itself is here. This photograph shows the SATA connectors on the card: 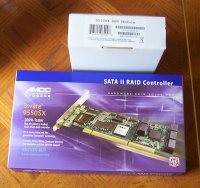
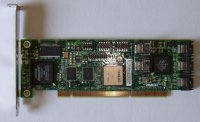
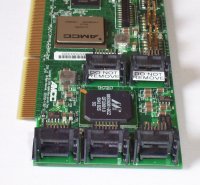
These are the product labels from the boxes: 
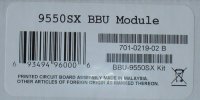
|
|
Battery Backup Unit
|
|
The use of write caching allows the controller to immediately tell the OS that the write has been performed, allowing the OS to carry on. The controller will write the data later. This approach also allows the controller to make certain optimizations and further increase performance. |
|
The next step
|
|
Now that I have the server and the RAID controller, I need some disks to hook up to it. If you happen to be in possession of eight SATA II drives with 16MB of cache, with a good performance record, I would love to hear from you. I'm sure we can come up with a good sponsorship arrangement that will benefit all parties concerned. Once I have the HDD, I will hook them up and do some performance benchmarks, burn in the drives, and then deploy the server. |
|
Thank you
|
|
I thank iXsystems and 3Ware for their assistance in getting this server project off the ground. Their help and generous donations are greatly appreciated. |