The FreeBSD Diary |
| (TM) | Providing practical examples since 1998If you buy from Amazon USA, please support us by using this link. |
|
The dual XEON box takes shape
7 November 2000
|
||||||||||||||||||||
| This page will record the progress of the dual XEON box I'm building up. It contains some photographs, an explanation of how I assembled the box, a list of the box hardware, and a request for donations of hardware needed to get the box up and running. | ||||||||||||||||||||
|
Background
|
||||||||||||||||||||
While I was at BSDCon, I was given two XEON 550MHz processors. They are
have a bus speed of 100MHz and contain 1MB of cache. The same person also gave me two 18GB
SCSI Ultra160 drives. Also given to me were:
|
||||||||||||||||||||
|
The case
|
||||||||||||||||||||
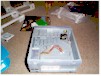
| The case was not a xeon-ready box. I suggest you look for that feature if you are
building a xeon box. The CPUs slot into the motherboard, much like a NIC, but much larger.
Make sure the board is properly attached to the case in order to prevent damage to the
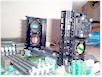
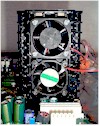
motherboard during CPU insertion/removal. I obtained the case from Quay Computers. The case is shown in the pictures. I like the case because it opens without tools. I did have trouble with the power supply. The fan didn't work. Otherwise, the PSU worked, but ran a bit warm to the touch. I obtained a replacement from the shop and swapped them over. It was then that you could see that one of the blades from the fan had snapped off. You could hear it rattling around inside. |
||||||||||||||||||||
|
The motherboard
|
||||||||||||||||||||
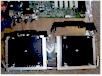
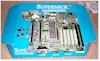
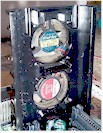
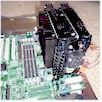
| The motherboard I obtained (courtesy of a kind cash donation) is a SuperMicro S2DGE. This is a
dual XEON board. The CPUs have a retention device which holds them stable. This places one
CPU right up against the other CPU. For cooling, the retention device allows you to add
CPU fans. I'm using two of these fans (there's room for four). I'm not sure if these are
necessary, but the massive heat-sinks were too hot to hold. With the fans, they are cool to
the touch. Pictures of the motherboard are here |
||||||||||||||||||||
|
Assembly
|
||||||||||||||||||||
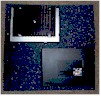
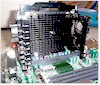
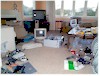
| The box has been assembled (want to see the pictures?) and
FreeBSD 4.1.1-RELEASE has been installed. Unfortunately, I don't have a controller capable
of handling those 18GB SCSI Ultra160 drives. So I've used two small IDE drives. As I've
found out, that's not even enough space for a build world. So the box is sitting there,
very fast. But more or less useless. The dual Xeon box was assembled over the weekend. Here's what it looks like. There are two sets of pics, large and small. The small ones vary in size from 72KB to 127KB. The large ones are from 221KB to 383KB. You decide which you want to see. More information on the assembly process is available at The XEON assembly story. |
||||||||||||||||||||
|
Donations
|
||||||||||||||||||||
| I'm still trying to obtain a few more items. For details, please see the hardware donations section. | ||||||||||||||||||||
|
Hardware things left to do
|
||||||||||||||||||||
|
||||||||||||||||||||
|
Software things left to do
|
||||||||||||||||||||
| I've never installed X. I plan to do that as soon as possible. Of course, this will be documented on the site. I'm also going to install Star Office as soon as possible. | ||||||||||||||||||||
|
The pictures
|
||||||||||||||||||||
| If you click on the picture, you will be taken to an image about 600x500, roughly
70K-127K. If you click on that one, you'll get the large version, which are 1152x864
and vary in size from 221K-387K. Enjoy. |
||||||||||||||||||||
|
||||||||||||||||||||